A 5-minute Guide on Deploying with Netlify and GitHub
Published on Mar 25 2022
Last updated on Apr 23 2024
This article will guide you through the process to host your static website on Netlify with GitHub for continuous deployment support.
Why use Netlify and GitHub?
Netlify allows direct import from GitHub (and GitHub helps track your changes which will enable continuous deployment). Signing up with GitHub makes your future deployments much easier (If you don't know how to set up Git and GitHub, read this documentation to get started). Netlify will handle building and deploying your changes, as well as hosting your website, saving you valuable time and energy.
Getting Started
If you are new to hosting or web deployment, or web hosting or anything related to these topics, it might be helpful to check out my other blogs:
Web Deployment Explained (coming soon)
A quick explanation about web hosting and different types of web hosting you need to know.
Domain vs. Web Hosting? (coming soon)
Step 1: Signup/Log in with Netlify
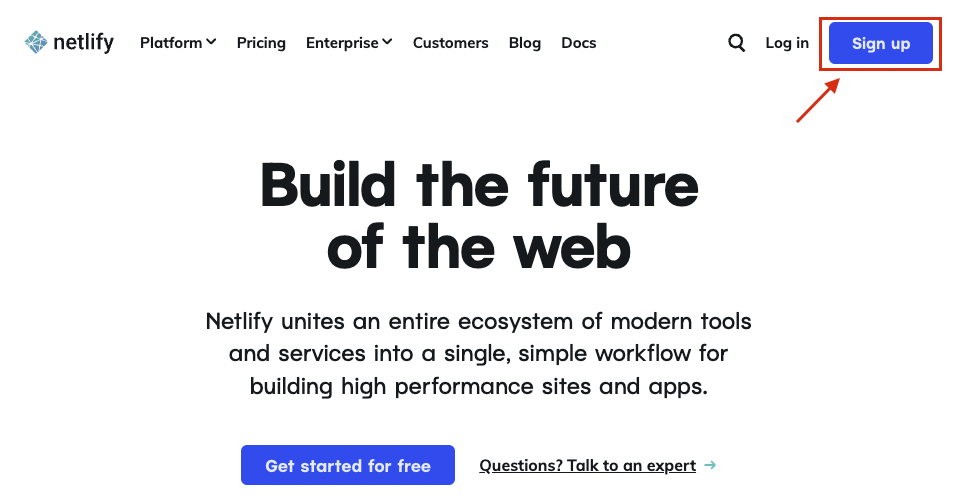
If you have already established a good understanding of what web hosting and deployment are, go ahead and create your Netlify account if you don't have an account yet. You should be able to sign up with GitHub.
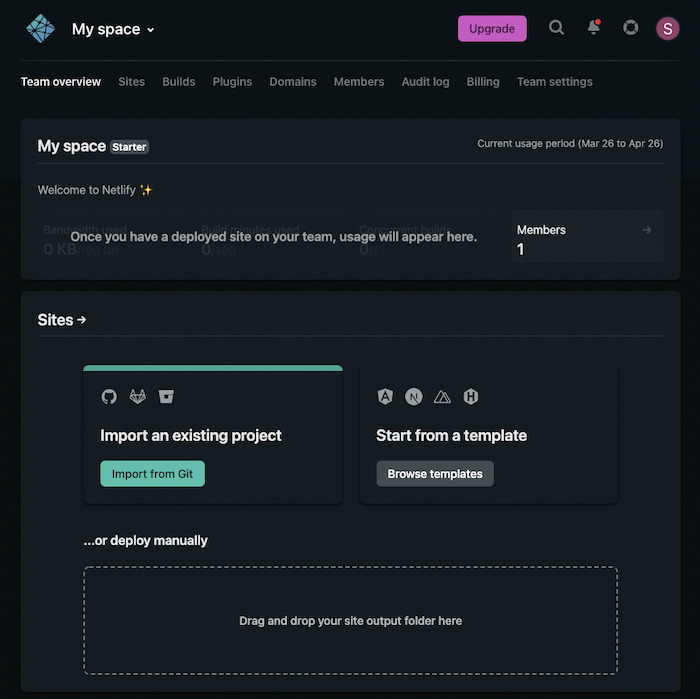
After you have done going through your registration process (which should ask you some personal questions and creating your own space), you should get to this screen below.
What happens when you import your project to Netlify?
When you import a project repository from GitHub, GitLab, or Bitbucket to Netlify, Netlify will be notified whenever the repository changes. Netlify then will show users of your project the changes, enabling continuous deployment.
What is continous deployment?
When your source code is changed, committed, and pushed to GitHub (or any website that can host git repos), your changes are built and deployed to some environment (could be a testing environment or straight to production). The process of deploying changes to an environment is called integration. Doing it automatically every time there's a change is called continuous integration. When your hosting server receives the new deployment, it will rebuild your site by running the appropriate command and, when finished, it will redeploy the new site (including all your changes) to your server.
Step 2: Import your site from GitHub (or any other Git repos management service) to Netlify
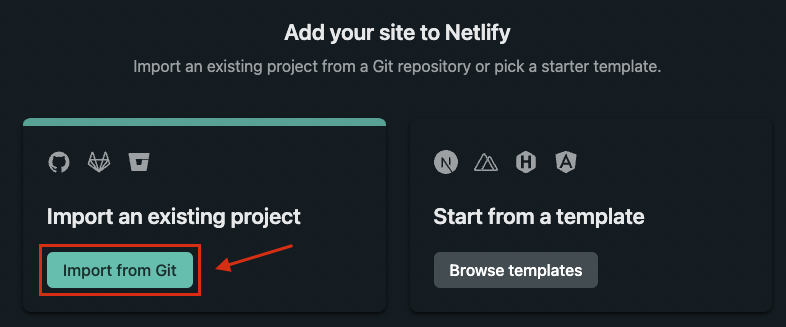
Now, you can choose to import from GitHub or GitLab or Bitbucket (or manually) but for the sake of this tutorial, we are going to use GitHub.
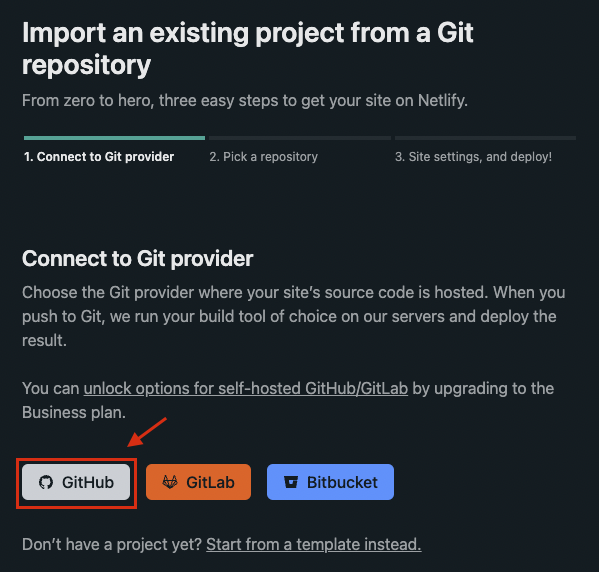
If you sign up with GitHub earlier, skip to step 3. If not, you will see a screen specify that Netlify needs your authorization to access your GitHub profile (so they can see all your repositories). Go ahead and authorize, then go to step 3.
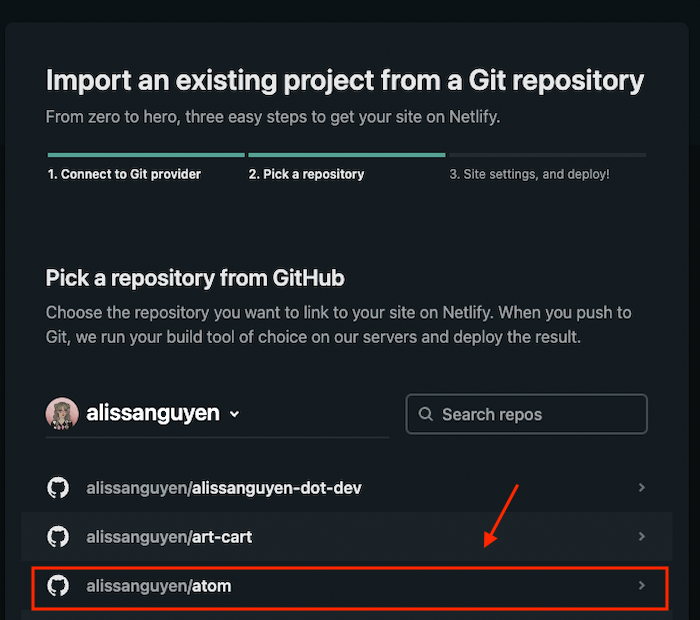
Step 3: Select the repository where you store your source code
Here I am trying to deploy my project alissanguyen/atom so I will go ahead and select it. You should select whichever GitHub repo that contains the source code that you want to deploy to a site.
Step 4: Configure your deployment settings
The default build command for projects build using npx create-react-app is npm run build. For other frameworks, your build command might be yarn build, or gulp build, etc.
Your publish directory should be the folder (a.k.a directory) where your production files are (the folder containing all your files after Netlify has finished building the site, in my example, the `build` folder is where all my production files are after Netlify runs the build command). Other common publish directories are `dist`, `public`, or `_site`.
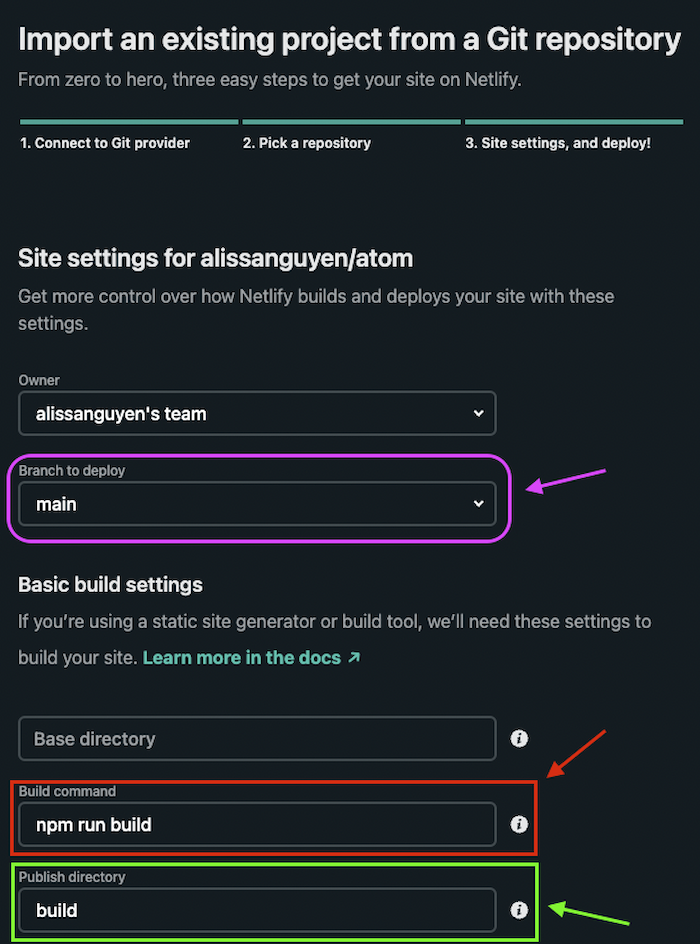
Make sure you select the right branch on your GitHub's project repository. You can double-check by going to your GitHub repository and check which branch your files are on.

Step 5 (Optional): Configure your advanced settings
Now, this step is completely optional and you probably won't need to right now unless you have some environment variables.
What are environment variables?
Environment variables are dynamic-named values that are used to store data outside of your application and can be accessed to configure a value in your code. Typically used in web applications to store privacy-related data such as API keys or API secrets.
It is important to keep your environment variables secured and don't expose them.
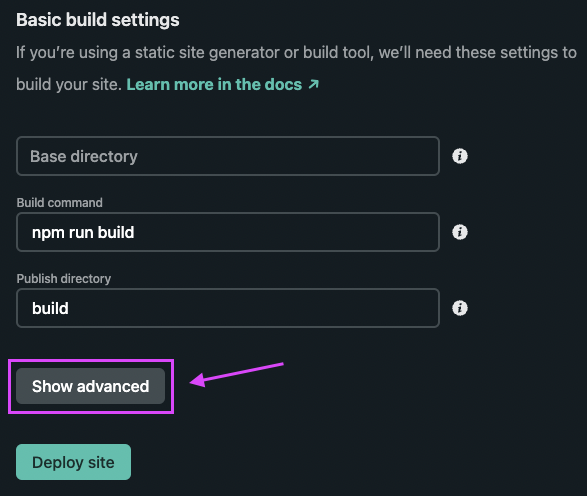
If you click on the Show advanced button, it will show you a screen where you can add your name-value pair environment variable(s).
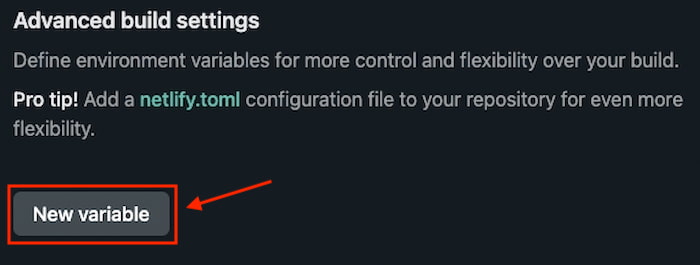
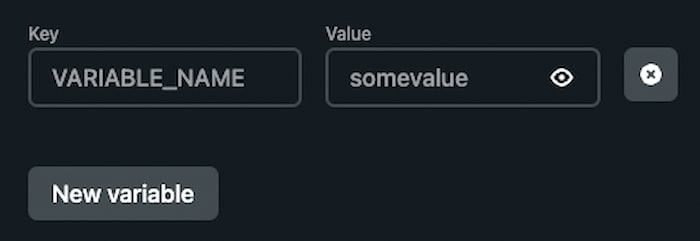
If you use any environment variables in your project, you need to configure them here or your deployment will fail.
Step 6: Deploy your site
After you have done configured your settings, go ahead and click on the Deploy site button.
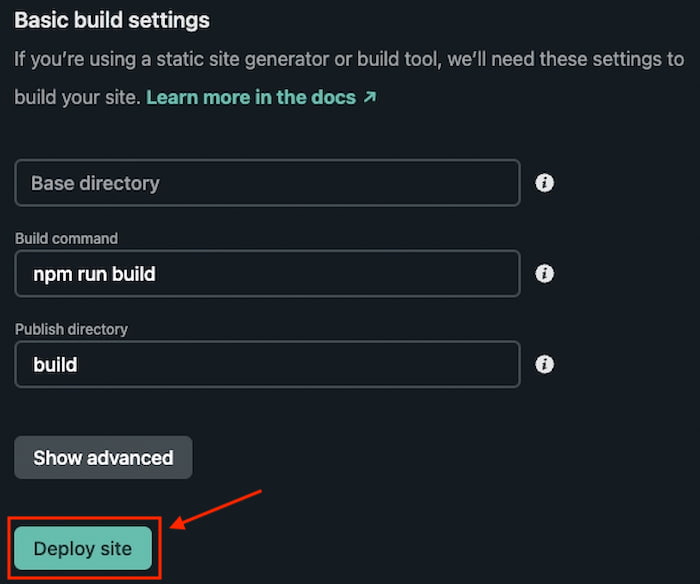
After clicking the button, Netlify will redirect you to their deployment window, where you will see the indication that your site is in progress. You can click on it to observe the deployment process.
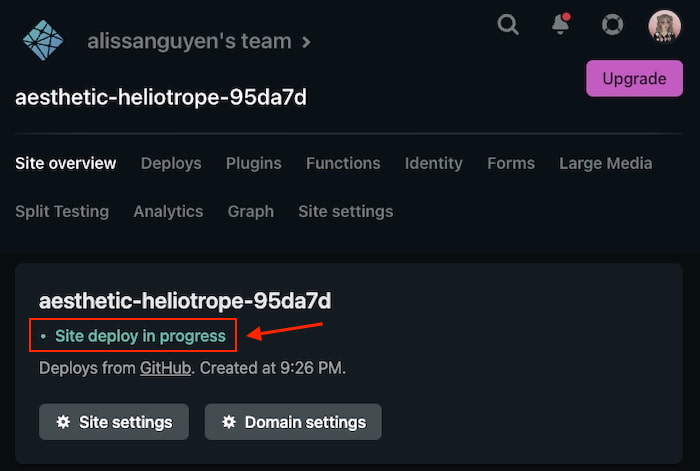
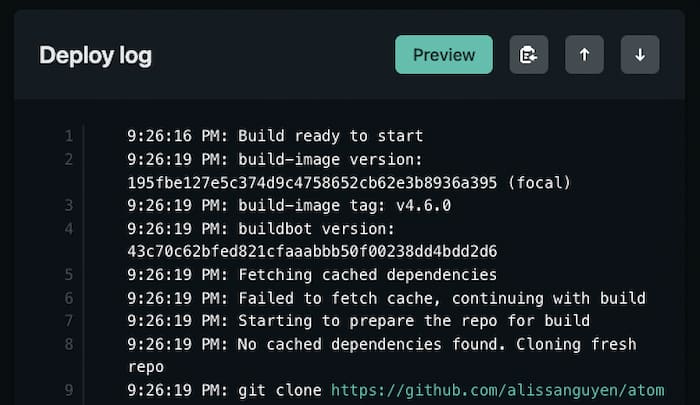
Step 7: Preview your site :)
Click on the Preview button on your Deploy log or click on Preview deploy to view your site. Netlify will open a new window with your site URL, generated by Netlify.
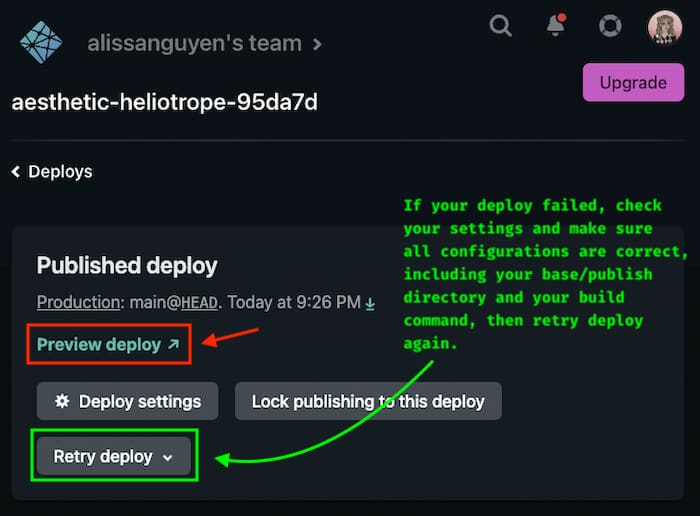

Step 8 (Optional): Update your site name
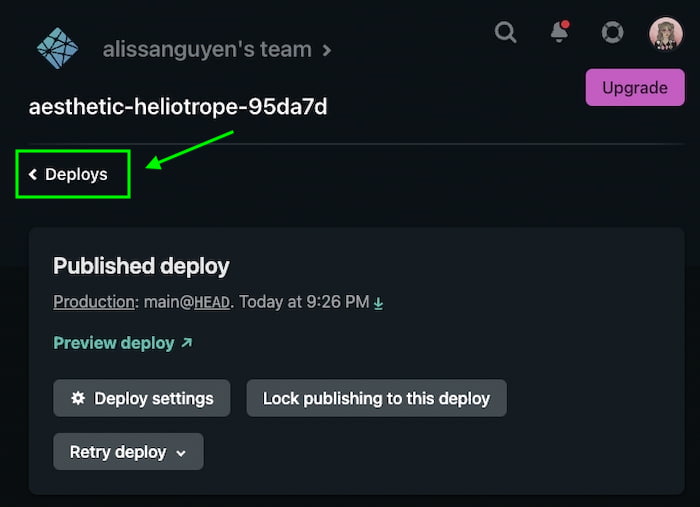
As you can see in step 7, Netlify generates this URL for my Atom's site: https://aesthetic-heliotrope-95da7d.netlify.app/. While it is not bad, it's not really what I want to name my site. So let's fix it. First, click the Deploys button to go back to your site's dashboard.
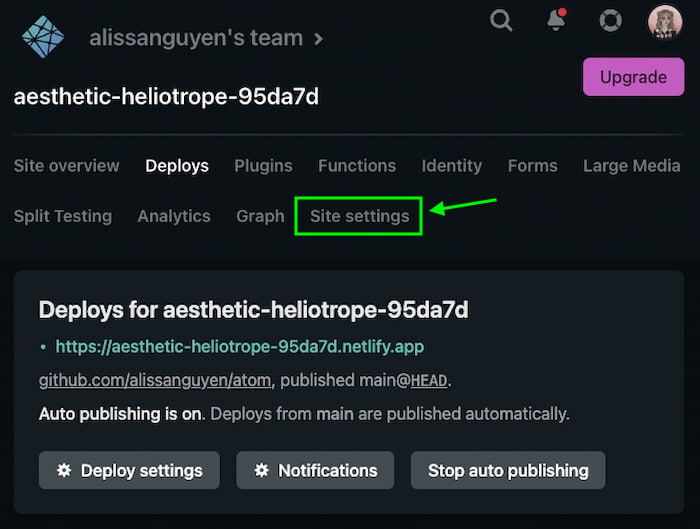
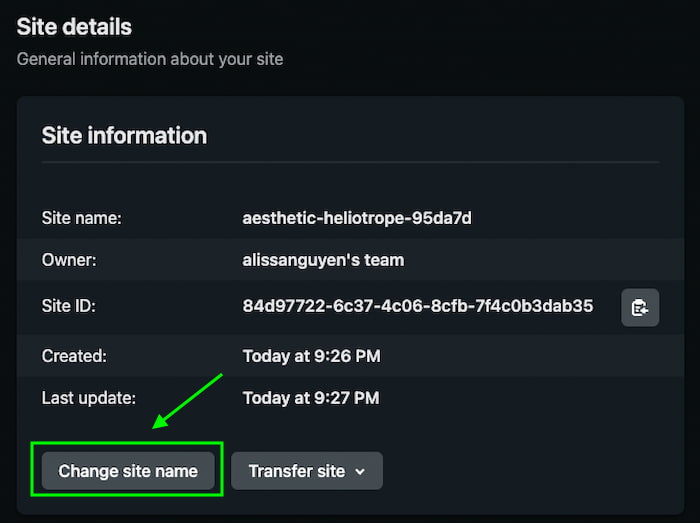
Then click on Site settings > Site details and you will see a Site information summary.
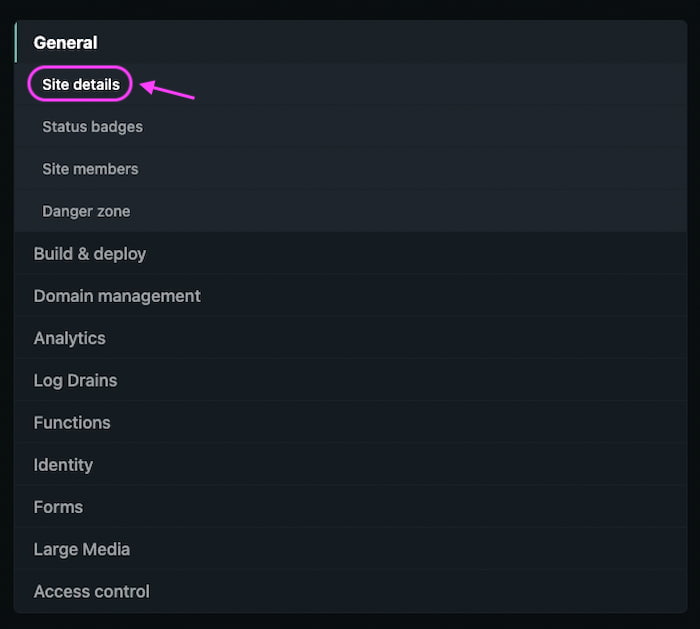
You can see general site information here, including the site name generated by Netlify. Click on the Change site name button, which will show you a modal (What is a modal window?) showing your current site name.
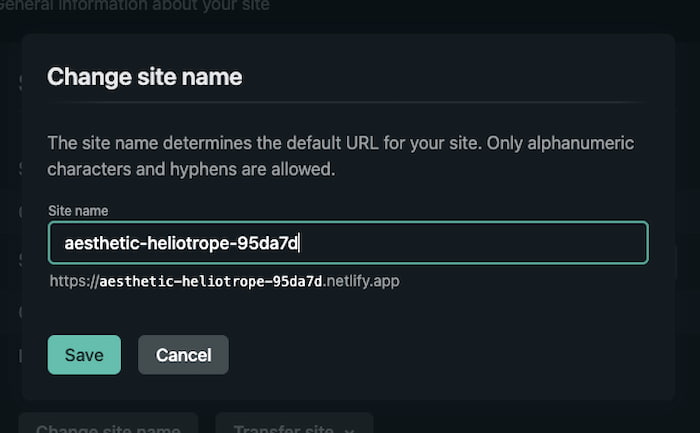
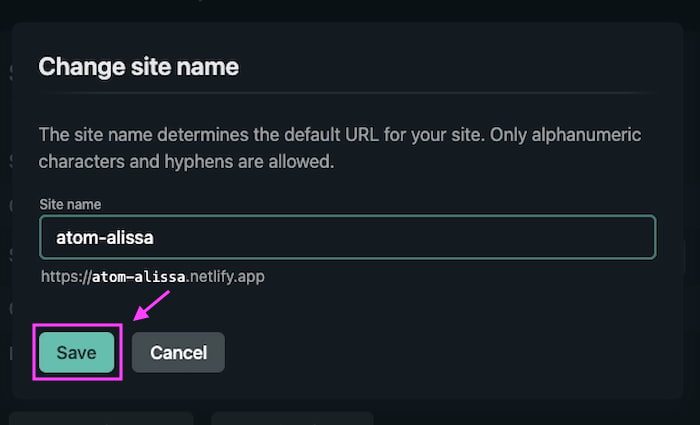
You can now edit the current site name to your preferred site name, I changed mine from aesthetic-heliotrope-95da7d to atom-alissa (because "atom" isn't available). You can then click Save to save your new site name.
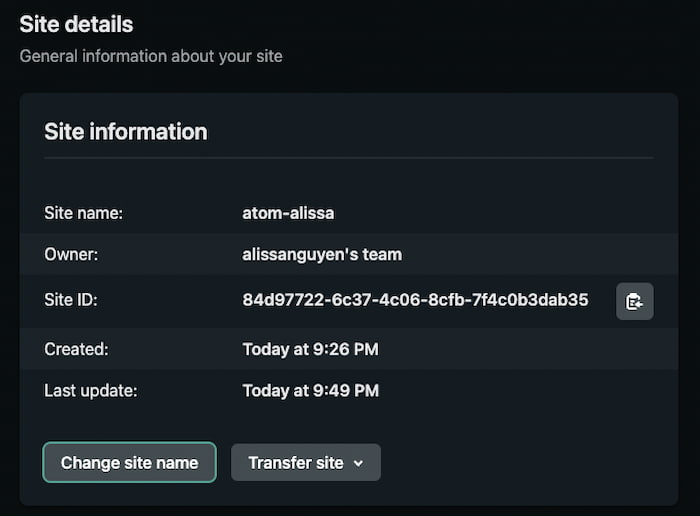
Congratulations! 🎉
You now have your site hosted with Netlify! I hope this easy-peasy tutorial will help with your next deployment!
Conclusion
Deploying with Netlify is super easy and fun, but looking at your new site's URL, you might want to have a more professional URL. Maybe a custom domain? Check out my next blog post Setting up your custom domain with Namecheap and Netlify.

Written by Alissa Nguyen
FollowAlissa Nguyen is a software engineer with main focus is on building better software with latest technologies and frameworks such as Remix, React, and TailwindCSS. She is currently working on some side projects, exploring her hobbies, and living with her two kitties.
Learn more about me
If you found this article helpful.
You will love these ones as well.